
Prioritize safety by thoroughly assessing the extent of water exposure before commencing any project. Disconnect the battery to prevent electrical hazards and mitigate further damage. Begin your restoration process by removing all wet components, including upholstery and carpets, which can harbor mold and odors.
Next, examine mechanical elements such as the engine and transmission. Flush out contaminated fluids, replacing oil, coolant, and transmission fluid, as these may have absorbed water. Inspect critical parts like electrical systems and connectors, cleaning and drying them to ensure they function correctly.
Once the mechanical systems are deemed operable, focus on the bodywork. Check for rust and corrosion, addressing these issues with appropriate treatments and sealants. Consider professional help for advanced procedures like body alignment or paintwork to restore the vehicle’s original appearance.
Finally, assess the vehicle’s overall condition, including tires and brakes, to confirm they meet safety standards. Reassemble all components carefully, ensuring everything is secured properly. With diligence and attention to detail, your project can transform a water-damaged vehicle into a reliable and restored mode of transportation.
Assessing Damage and Determining Restoration Viability
Begin with a thorough visual inspection. Look for water entry points, rust, and corrosion. Check the engine compartment for signs of moisture on electronics and the air intake. Electrical systems are highly susceptible; testing all wiring and components is critical.
Evaluate the interior for mold, mildew, or severe damage. Remove seats and carpets to inspect underneath, as trapped water can lead to significant issues. Assess the dashboard and control systems–these can be expensive to replace if damaged.
Next, examine the structural integrity. Use a level to check alignment of the chassis, as frame bending can compromise safety. Take note of any weak spots or repairs needed on body panels, which can affect overall stability.
For mechanical systems, inspect all fluids, including oil, coolant, and transmission fluid. Contamination from floodwaters can indicate severe impairment. Perform a diagnostic check for any computer system failures; these can be costly to rectify.
Finally, conduct research on the specific model. Determine if parts are readily available for replacement. Compare restoration costs against market value. If expenses surpass potential resale value or safety is compromised, reconsider the project. Prioritize practicality and financial feasibility in restoration decisions.
Cleaning and Drying Components of Flood-Damaged Vehicles

Begin with removing the battery. Inspect terminals for corrosion; clean with a baking soda solution. Use a multimeter to check functionality before reinstallation.
Next, address the interior. Remove upholstery, carpets, and pads. Clean hard surfaces with a solution of vinegar and water. Allow to dry thoroughly to prevent mold growth.
For electronics, disassemble components carefully. Use isopropyl alcohol to clean circuit boards. Dry completely using a low-heat setting on a hairdryer.
Inspect the engine compartment. Clean electrical connectors with a brush and electrical contact cleaner. Dry using compressed air to remove moisture from tight spots.
Fuel systems require attention. Drain and replace the fuel tank and lines if contaminated. Clean the fuel pump and filters. Ensure everything is dry before reassembly.
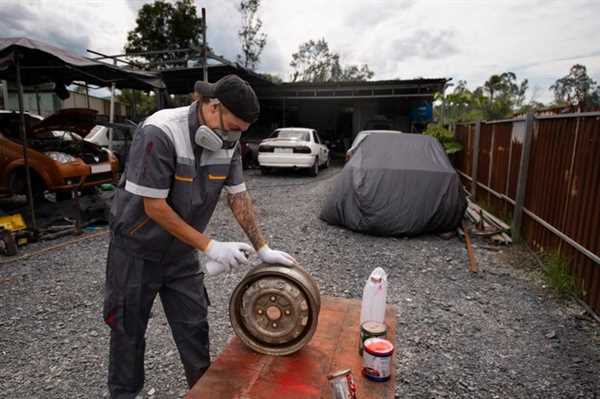
Wheels and brakes should also receive thorough treatment. Clean brake assemblies and remove rust. Inspect wheel bearings and repack if necessary, ensuring all components are free from moisture.
Finally, regularly check all cleaned surfaces for any signs of mold or corrosion. Maintain a dry environment to prevent recurring issues. Take proactive measures to preserve the integrity of the vehicle during the restoration process.
Replacing Electrical Systems and Ensuring Safety Standards
First, disconnect the vehicle’s battery to prevent any short circuits during the work. Inspect all electrical components for corrosion and water damage, including wiring harnesses, connectors, and control modules. Replace corroded parts with new or refurbished equivalents to ensure reliability.
Use a multimeter to test critical circuits for continuity and correct voltage. Replace any broken fuses or relays, as these can significantly affect the electrical performance. Body control modules must be checked and replaced if moisture has penetrated them.
Ensure all grounding points are clean and free of rust to facilitate proper electrical flow. Apply dielectric grease to connectors to provide insulation against moisture and future corrosion.
Install new wiring where necessary, ensuring that connectors and splices are waterproof. Utilize heat-shrink tubing for added protection against elements.
After completing the replacement of electrical systems, conduct a thorough safety inspection. Check airbag systems, anti-lock brakes, and any other safety-critical components. Conduct a pre-test to confirm that systems are functioning correctly before allowing the vehicle back on the road.
Always adhere to state and local regulations regarding vehicle standards to ensure compliance for safe operation. Keeping documentation of electrical repairs and replacements is beneficial for future reference and resale value.
Related Posts

How to Replace Salvage Car Interiors
Begin this task with a thorough evaluation of the vehicle’s…

Restoring Salvage Sports Cars – Is It Worth It?
Engaging in the rehabilitation of damaged performance vehicles can yield…

DIY Tips for Repairing Salvage Cars
Begin with a thorough inspection of the vehicle’s body and…