
Begin with a thorough inspection of the vehicle’s body and engine components. Assess the extent of dents, rust, and mechanical issues. Create a checklist of necessary parts and tools based on your findings; this will enable you to stay organized and focused.
Prioritize your tasks by addressing safety-critical repairs first. Ensure brake systems and tires are fully functional before diving into cosmetic improvements. This method not only enhances overall safety but also prevents additional damage down the line.
Utilize online platforms and local forums to source affordable parts. Salvage yards and classified ads often contain hidden gems that can significantly lower your expenses. Sharing information with fellow enthusiasts can unearth valuable tips and leads on where to find budget-friendly components.
Invest time in learning basic skills like welding, painting, or upholstery repair. Numerous free resources, including video tutorials and community classes, can provide a foundation. Performing these tasks yourself can save substantial labor costs while offering an enriching experience.
Finally, document your progress meticulously. Not only does this help track improvements, but it also serves as a valuable resource for future projects. Sharing your journey on social media or blogs can inspire others while creating a supportive network of enthusiasts.
Assessing Damage and Estimating Repair Costs for Salvage Vehicles
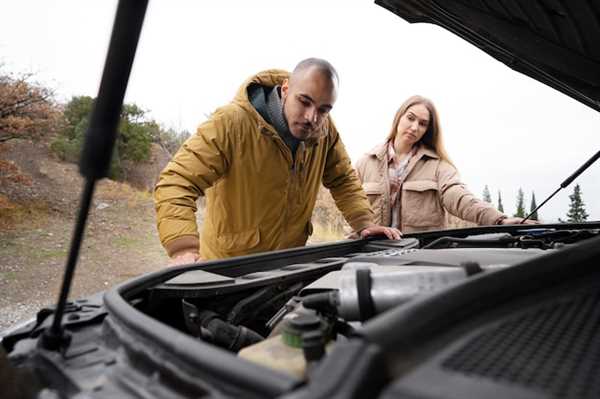
Begin with a thorough inspection of the vehicle. Look for visible signs of damage, including frame issues, body panel dents, and rust. Pay special attention to the engine and transmission as repairs in these areas can be costly.
Utilize a repair manual specific to your model to identify common problems and their typical solutions. This resource can provide valuable insight into necessary parts and labor involved.
Estimate costs by researching local auto parts stores and online marketplaces. Compare the prices of replacement parts necessary for restoration, including any specialized tools that may be required for the job.
Calculate labor costs if you plan on seeking assistance. Understanding local labor rates will give clarity on whether to handle tasks personally or outsource.
Factor in additional expenses such as paint, safety equipment, and any possible inspection fees required to get the vehicle roadworthy. Always keep a margin for unforeseen complications.
By examining each area critically and gathering accurate price information, you can create a detailed budget that provides a clearer picture of the total investment required for the project.
Considering the potential for resale or usage, weigh the repair costs against the vehicle’s value. This assessment will guide your decision-making process efficiently.
Essential Tools and Materials Needed for DIY Car Repairs
Wrench set is a must-have for any automotive project. Opt for a combination of open-end, box-end, and adjustable types to handle a variety of fasteners on your vehicle.
Socket set allows for easy tightening and loosening of nuts and bolts in tight spaces. A ratcheting mechanism will make your tasks more manageable.
Jack and jack stands are critical when working under a vehicle. Ensure the jack can support the vehicle’s weight and invest in sturdy stands for safety.
Torque wrench guarantees that nuts and bolts are tightened to the correct specifications, preventing damage and ensuring optimal performance.
Screwdriver set should include both flathead and Phillips types in various sizes. Magnetic tips can help you keep track of small screws.
Multimeter is useful for diagnosing electrical issues within the vehicle. It assists in checking battery voltage and continuity of circuits.
Oil filter wrench simplifies the process of changing the oil and ensures a clean, spill-free experience.
Safety goggles and gloves protect your eyes and hands from debris, chemicals, and sharp edges during any maintenance task.
Cleaning supplies, such as degreasers and rags, will help maintain a tidy workspace and keep parts free of grime.
Replacement parts can include filters, belts, and fluids specific to your vehicle’s make and model. It’s wise to source these from reputable suppliers.
Repair manuals or online resources provide valuable information on procedures and specifications unique to your vehicle, aiding in accurate and confident work.
Step-by-Step Guide to Fixing Common Issues in Salvage Cars
Begin with a thorough inspection. Check for visible signs of damage on the body, frame, and underneath. Look for rust or structural issues that could affect safety.
Next, focus on engine trouble. Look for leaks around hoses and connections. Check the oil level and clarity; if it’s dark or gritty, an oil change is necessary. Ensure the battery terminals are clean and the battery holds a charge.
Inspect the electrical system. Test all lights, indicators, and the stereo system. Replace any blown fuses and consider wiring repairs for persistent issues.
For braking problems, examine brake pads and rotors. Any uneven wear indicates it’s time for replacement. Check brake fluid levels and ensure there are no leaks in the lines.
Address suspension issues by evaluating shock absorbers and struts. Push down on each corner of the vehicle; if it bounces excessively, components likely need replacement.
Examine tires for wear and proper inflation. Ensure they’re evenly worn; uneven tread can signal alignment issues. Rotate or replace as needed to maintain optimal handling.
For transmission concerns, check fluid levels and condition. Slipping or rough shifting may require a fluid change or professional inspection.
Finally, focus on cosmetic details. Minor dents or scratches can often be fixed with body filler and paint. Ensure to match the vehicle’s color code for best results.
Related Posts

How to Repair Salvage Hybrid and Electric Cars
For those considering the journey of fixing a damaged eco-friendly…

How to Restore a Flood-Damaged Salvage Car
Prioritize safety by thoroughly assessing the extent of water exposure…

Restoring Salvage Sports Cars – Is It Worth It?
Engaging in the rehabilitation of damaged performance vehicles can yield…